Blending the digital and physical with our Geofencing Add-On
Written by Muriel Santoni on
Hello GoodBarbers !
Today is a big day for GoodBarber because I’m about to present you with the result of months of hard work…
I’m talking about a new Add-On which you can now find in our store. Yesterday, we introduced the Scheduled Push Add-On , which was the first of a series of updates.
And it is now the turn of the Geofencing Add-On to be in the spotlight!
What is Geofencing?
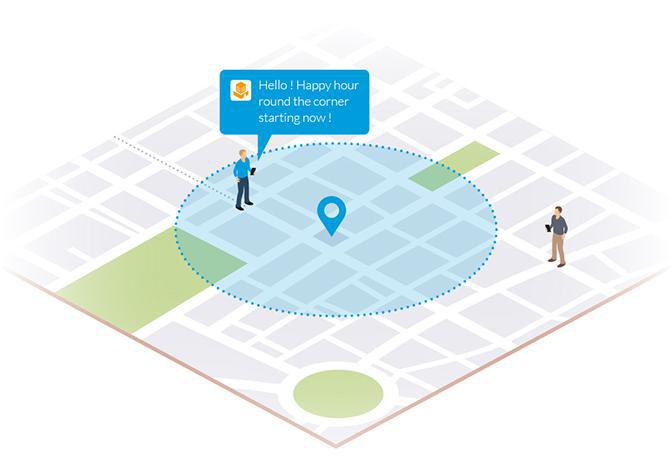
It is a technology which allows you to interact with your app users using notifications, triggered by their behavior within a designated geographical area.
In a nutshell, thanks to this new Add-On, you can create areas of interest and communicate with your users when they enter the region, after they dwell in the region for quite some time, or when they leave the region.
Can you imagine the possibilities in store for you?! ;)
In a nutshell, thanks to this new Add-On, you can create areas of interest and communicate with your users when they enter the region, after they dwell in the region for quite some time, or when they leave the region.
Can you imagine the possibilities in store for you?! ;)
How to activate the Geofencing Add-On?
As usual, go to the Add-Ons menu > Catalogue > Notifications section. Access the detailed page of the Add-On and click on Install.
The Geofencing Add-On is available with the Full & Advanced plans.
Once the Add-On is activated, a new menu will appear in your back office: Users > GeoAlert.
The GeoAlert menu will give you access to two submenus: Notifications & Geofences.
The Geofencing Add-On is available with the Full & Advanced plans.
Once the Add-On is activated, a new menu will appear in your back office: Users > GeoAlert.
The GeoAlert menu will give you access to two submenus: Notifications & Geofences.
Creating a Geofence
This is the first step. Go to the Users Menu > GeoAlert > Geofences.
If you haven’t created a Geofence yet, you will be automatically redirected to the page from which to create a Geofence.
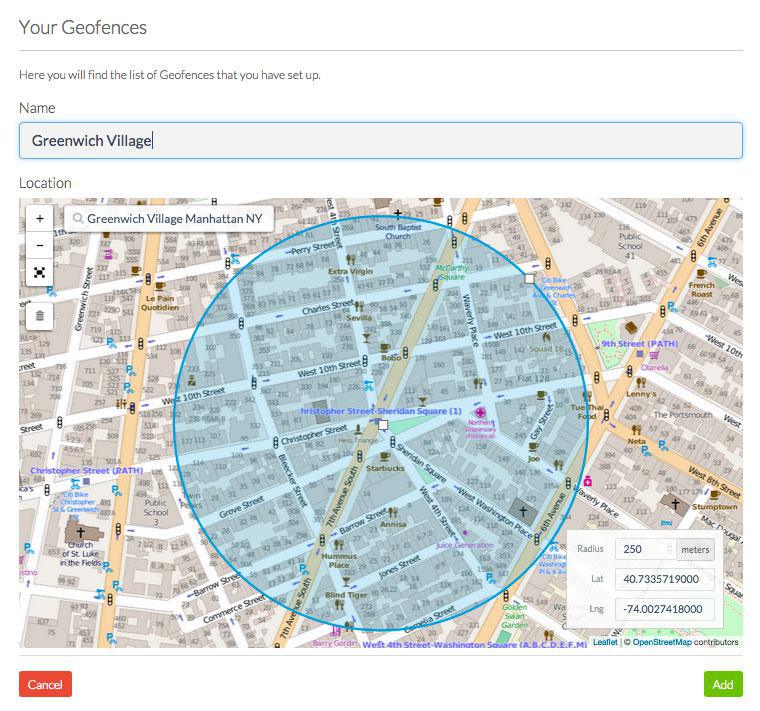
To create it, it’s easy. Simply give it a name and define a geographical area associated with it. And you’re done!
If you haven’t created a Geofence yet, you will be automatically redirected to the page from which to create a Geofence.
To create it, it’s easy. Simply give it a name and define a geographical area associated with it. And you’re done!

Once your first Geofence is created, you will be able to access the list of all the Geofences you’ve created, their status as well as the notifications associated to them. This list can show as a chart or a map :)
Creating notifications
The next step consists of creating messages which will be sent out according to your users behavior within areas which you’ve defined beforehand.
To do so, go to the Users Menu > GeoAlert > Notifications.
Just like with the Scheduled Push , you can type in your message, choose the action it will trigger when opening the message, target your users and decide when you wish your notification to be sent out.
As you might have already guessed, the big difference is the geolocating criteria.
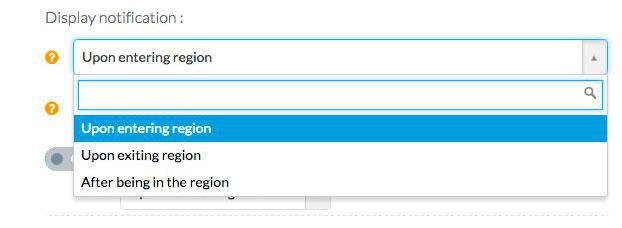
You must choose upon which occasion the notification will be sent out to your users:
- Upon entering the region
- After dwelling in the region
- When leaving the region
To do so, go to the Users Menu > GeoAlert > Notifications.
Just like with the Scheduled Push , you can type in your message, choose the action it will trigger when opening the message, target your users and decide when you wish your notification to be sent out.
As you might have already guessed, the big difference is the geolocating criteria.
You must choose upon which occasion the notification will be sent out to your users:
- Upon entering the region
- After dwelling in the region
- When leaving the region
If you have created several, you will have to choose which Geofence to assign to which notification. Just like with other notifications, a preview of your message and summary of the settings associated with it will be available at the right of your screen during the whole creation process.
Managing & Analyzing made easy
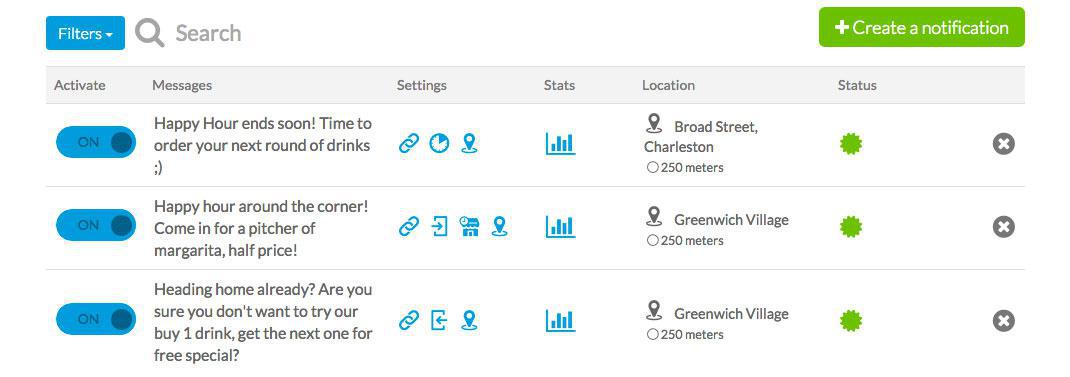
Once you’ve created your first notification, you will have access to the list of all your notifications, their status, the message they contain, the settings that apply, and the Geofence they are attached to.
From that interface you can also, in just one click, activate or deactivate the notifications or even delete them.
From that interface you can also, in just one click, activate or deactivate the notifications or even delete them.
As with all other notifications, you can access statistics, which will allow you to analyze your campaigns performance and to learn from it ;)
Once you have activated the Add-On, you can create 3 Geofences for free. If you need more, you can purchase 25 additional ones for $60/ year.
Once you have activated the Add-On, you can create 3 Geofences for free. If you need more, you can purchase 25 additional ones for $60/ year.
Translated by Isabella Leland