Shake up your business with our iBeacons Add-On
Written by Muriel Santoni on
Hello GoodBarbers,
We are on a roll! Here comes a new update!
After the Scheduled Push Add-On and Geofencing , it is now time to talk about the Add-On which will send your business into a new dimension: the iBeacons Add-On!
This Add-On has a huge potential, and I am certain that it will spark a lot of amazing ideas to make the most of your Beautiful App ;)
Let’s take a closer look…

Beacons are devices which send out Bluetooth wireless signals, allowing you to define a range within which the user will receive a notification.
Therefore, it is a way to create geolocated notifications, very much like with the Geofencing Add-On. The main difference is that Geofencing applies to relatively large areas, whereas Beacons allow more refined geolocating and are consequently covering more limited areas… You will soon understand why!
Each beacon has a unique identification, made up of 3 parameters:
- The UUID: this is a unique identifier specific to the owner of one or several beacon(s).
- The major: this data is used to differentiate beacons under the same UUID.
- The minor: identifies beacons within the same major.
If it might seem complicated put this way, you will see that it is in fact easier than it looks.
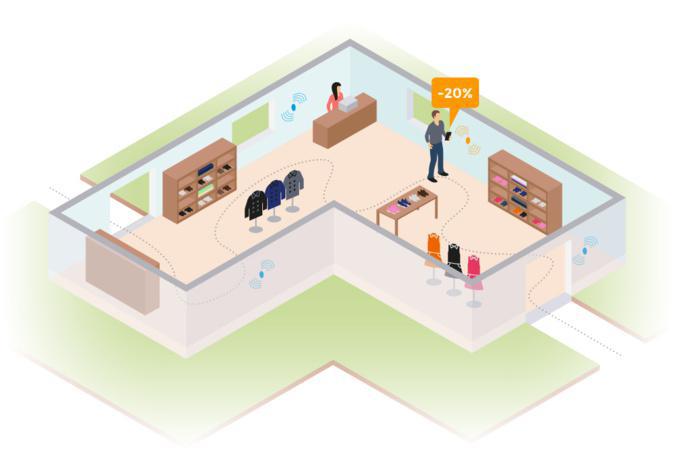
In the case of our clothing store, all the beacons will have the same UUID (the one of the shop), a major for each aisle of the store, and then a minor for each item in front of which a beacon will be placed. Simple enough, right? ;)

Step 1 : Buying & setting them up
There are several beacon manufacturers, but be careful when it comes to their compatibility with Apple and Google. It would be a shame if they proved useless for your Beautiful App ;)
That is why we recommend two manufacturers, Kontakt & Estimote , who both produce beacons compatible with Apple and Google.
We’ve come up with tutorials to guide you through the process of setting up the beacons for the two manufacturers. How thoughtful of us ;)
Step 2 : Registering the Beacons and creating your messages
Once installed, a new menu will appear within your back office: Users Menu > GeoAlert > iBeacons. You will have to fill in the UUID of your beacons as well the Beacon Layout, a fixed value, defined by the brand of your beacons.
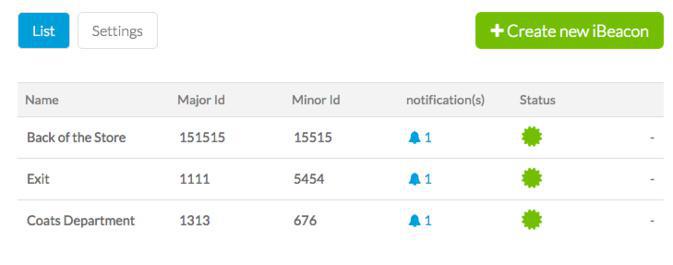
Then click on the "Add a Beacon" button; at this point you just have to name it, assign a Major ID and Minor ID to it.
And you’re good to go ;)
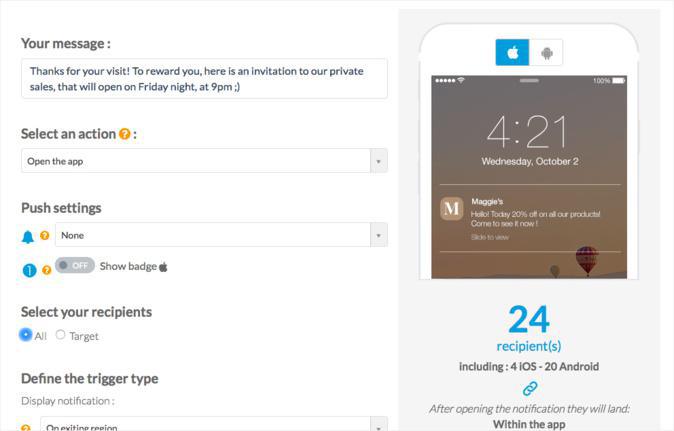
Just like with the Geofencing Add-On you will be able to create notifications which will be sent out relying on your beacons, from the Users Menu > GeoAlert > Notifications.
What will trigger the notification?
- When the user enters the region
- After the user dwells in the region
- When the user leaves the region
Within which time lapse will the user receive the notification?
- Whenever
- During a specific time lapse
- During business hours (for you to define, daily)
You see, nothing too complicated after all!
Of course, you will have access to the list of your notifications, as well as statistics tools, which will allow you to manage, analyze and improve your communication in just a few clicks!
Step 3 : Setting up the Beacons in your space
I am really looking forward to finding out what inventive ways you will find to integrate this Add-On within your Beautiful Apps!
The iBeacon Add-On is available with the Full and Advanced plans. It comes with 3 Beacons included. If you need more, you can purchase 25 additional Beacons for $12/month.